How to Manage Suppressed Contacts

Sometimes the best intentions lead to the worst results. When a recent and valiant effort to manage a large list of email addresses turned into a desperate support call, OpenMoves was able to offer well received insight. We’d like to share that learning experience with you. Here’s how to best manage your suppressions on the OM3 platform.
Suppressed Contacts
The Suppressed tab displays a list of all your contacts who have unsubscribed from your communications plus bounced addresses or those registering as an ISP Spam complainant.
To get to the Suppressed Contacts tab, navigate from Contacts > Suppressed Contacts

Suppressed Domains
The Suppressed domains tab displays a list of all domains that have been suppressed. By adding suppression at a domain level, all email addresses in your address books for that domain are automatically suppressed. This saves you a lot of time when a company asks to be removed as a whole from your lists.
To add a new domain to this list, click on the +NEW DOMAIN SUPPRESSION button.
Add Suppressions
This process enables you to upload or manually add any email or domain addresses you would NOT like included in your campaign sends.
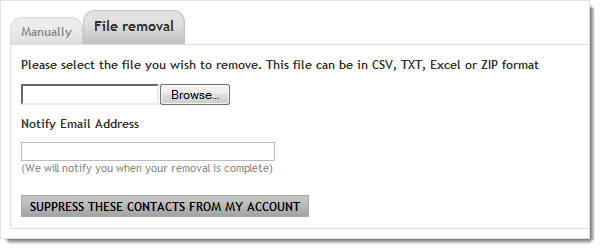
File removal – If you have a lot of email addresses and/or domains to suppress, you may prefer to do this via upload of an .xls, .txt or .csv file. Use the Browse button to select the file on your computer.
You can enter an email address to be notified once the import has finished – this is particularly useful if you are uploading a large list. Once you have entered your addresses or selected your file, click on the SUPPRESS THESE CONTACTS FROM MY ACCOUNT button. Your entries are processed and a summary report is displayed.
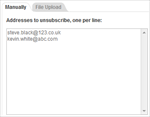
Manually – use this tab to enter email addresses or domains individually.
Simply type the email address into the area provided ensuring you enter only one email address per line as shown in the example. Each of these email addresses will be added to your Suppressed contacts list and excluded from any future email sends.
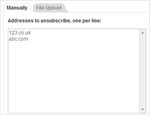
If you wish to suppress all email addresses at one company then simply add the domain instead as shown here. Again, make sure there is only entry per line.
Regardless of the method you choose, whether manually entering, pasting text or uploading a file, email addresses suppressed will appear on the Suppressed contacts tab.
Domains will appear on your Suppressed domains tab and any email addresses relating to those domains will appear on the Suppressed contacts tab.
Suppression History & Reversing Suppressions
The Suppression history tab shows only manually imported file suppressions created in the last 30 days. It does not show any manual suppressions you may have made through More actions when inside an address book.
You can delete imported file suppressions from this list. It will result in the contacts being deleted from the whole system, although a message will inform you of this consequence before you complete the deletion. You will then need to add any contacts back to the address book or books they were previously part of in order to restore them and thus reverse the suppression.